Disabling Firewall in Windows OS
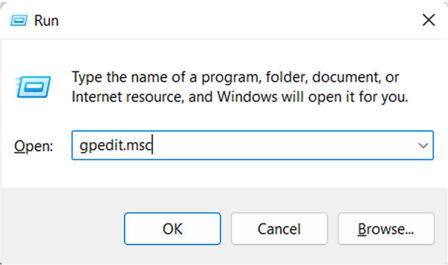
- Go to the start menu and type ‘RUN’, when the Run prompt opens, type
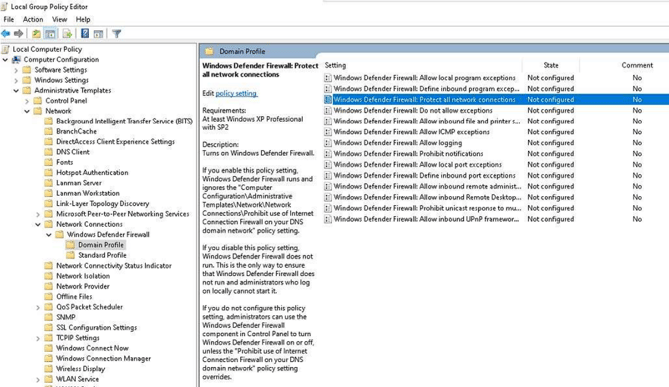
gpedit.msc: - Under Local Computer Policy, Select Administrative Templates, Network, Network Connections, Windows Defender Firewall, then Domain Profile. Highlight Protect all network connections and click policy setting:
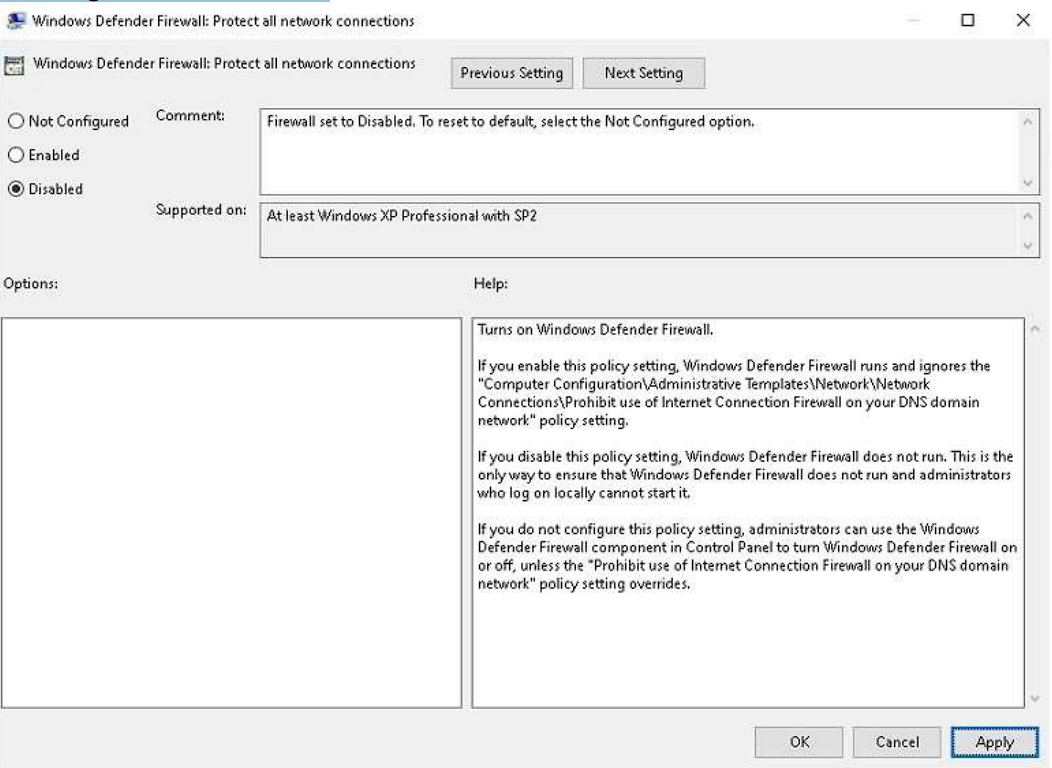
- Select the Disabled Option on the left of the Protect all Network Connections menu. Click Apply at the bottom right of the screen:
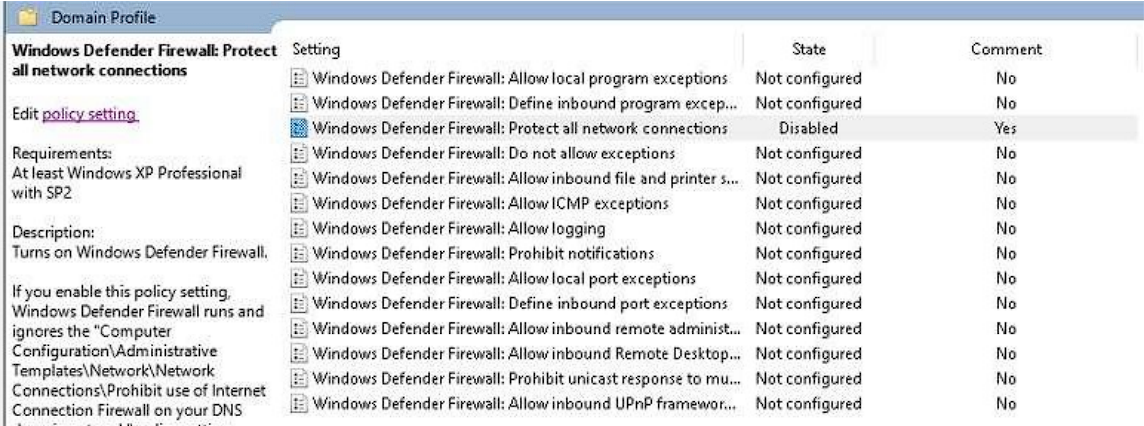
- After clicking Apply, you will return to the Domain Profile screen, and it will show that the state is 'Disabled' for 'Protect all network connections'. Go back to step 2 and choose standard profile instead of domain profile. Do the same process to disable protect all network connections on the standard profile:
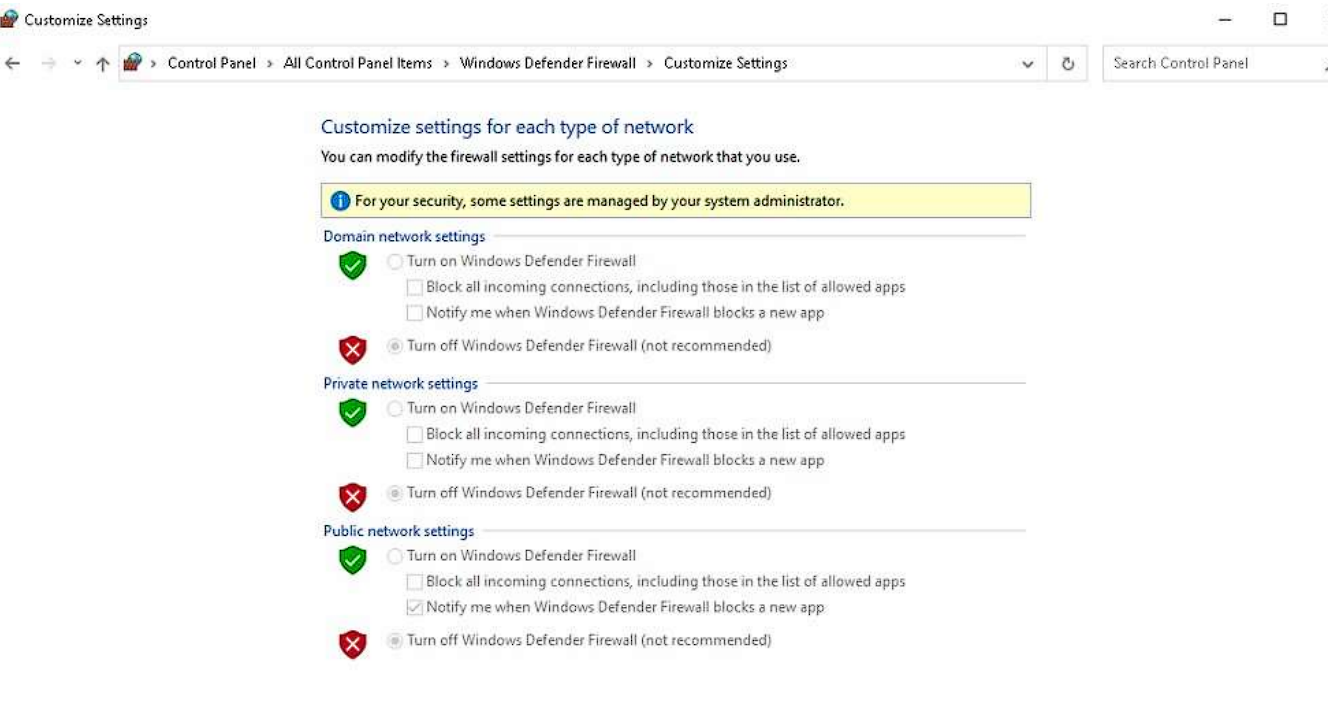
- The Windows Defender firewall setting will be grayed out now that the firewall is disabled. Administrative privileges are revoked when attempting to change the firewall settings.
- To re-enable firewall privileges, navigate to the Domain and Standard profiles and change the 'Protect all network connections' policy setting to ‘Not Configured’ in both profiles. Follow steps 1-4 but instead of selecting disable, select Not Configured.